Tuesday, August 30, 2005

Wiring Harness Woes


If you own a Volvo turbo that is of the 80's vintage, you probably have noticed that the insulation on the engine wiring harness has started to crumble and fall off leaving bare copper wire. This is caused by the high under-hood temperatures of the turbo motor. This is bad news. Fortunately, replacement harness are available from Volvo. You will need to quote your VIN number when ordering as there are at least 2 different harnesses and you still might end up with the wrong harness, like I did :( The harnesses run between $150-300, depending on your car. Short of rebuilding the entire harness yourself, this is your only option. The main plug is on top of the driver's front wheel well.

Biodiesel


I have started using biodiesel in SoDak and my 2000 VW Jetta TDI. In my opinion, the Jetta runs better on biodiesel. it is quicker and gets about 2 mpg better mileage. Do not confuse this with a WVO (Waste Vegetable Oil) system, AKA Greasecar. I am sort of a tree-hugger and the idea of not using any foreign oil appeals to me. I am running B100, 100% Biodiesel made from corn and soybean oils. Living in Minnesota, I am a member of the Twin Cities Biodiesel Coop which is affiliated with Fry Away . Yes, it's more expensive than "dino diesel", but has lower emissions, does not contribute to global warming, supports 
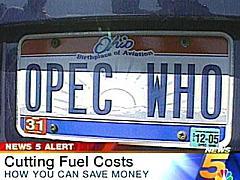
MN farmers instead of a certain Middle-East Monarchy and smells really nice.

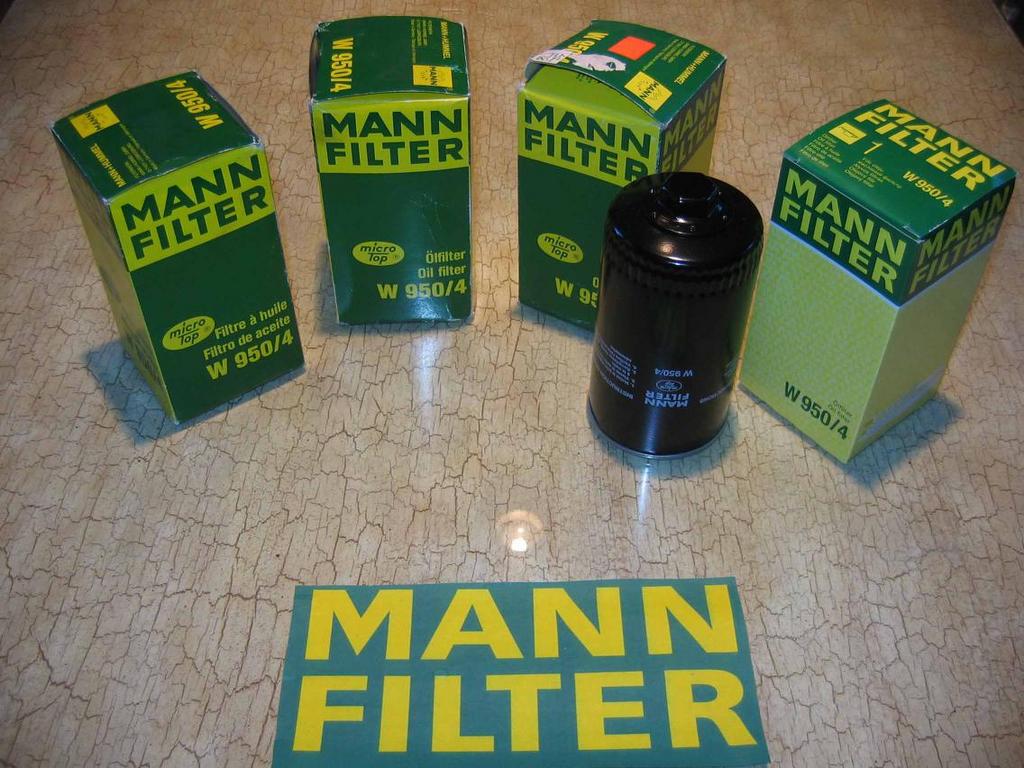
My 2000 VW Jetta's fuel lines are certified by VW for use with biodiesel so no worries, mate. Upon switching to biodiesel all you will need to do is change your fuel filter 1-2X over the next year as biodiesel is a solvent and, over time, will carry any petroleum diesel residue that has been building up in your fuel tank over the years to the filter and clog it up over time. If you have a new diesel, there will be no accumulation so no filter changes will be necessary.

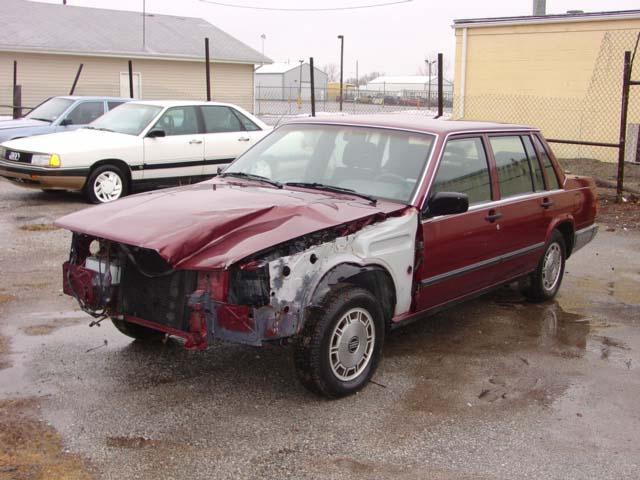
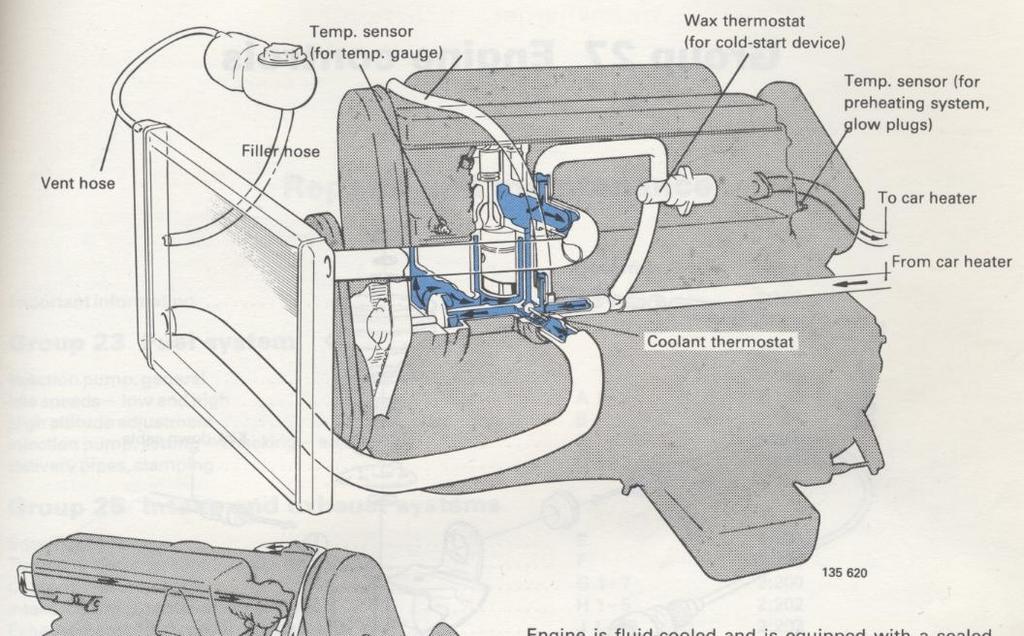
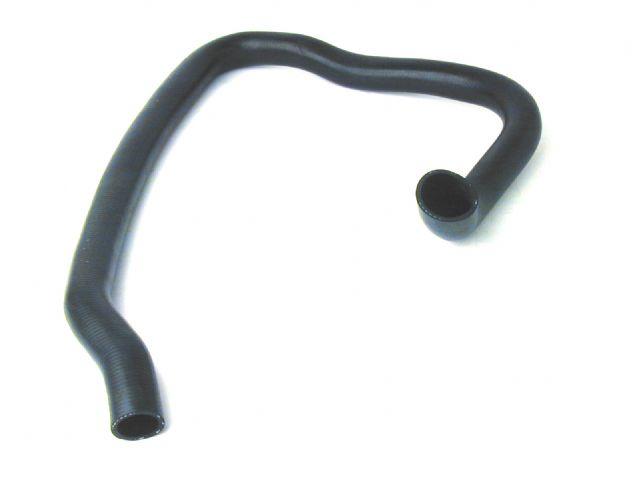
The issues with converting the Volvo are more complicated. The Volvo's rubber fuel system components will deteriorate over time. I am in the process of switching the main and return fuel lines in SoDak over to plastic-available from junked SAAB 900's. I am on my third tank of biodiesel in SoDak and have had no issues. My fuel pump has been rebuilt so I am assuming it has Viton seals and not rubber ones. If not, I'll find out soon :) Viton is a fluoroelastomer and does not degrade in biodiesel. McMaster-Carr sells Viton tubing. Search "viton" on their site. You want 3.5mm inner diameter tubing for the injector return lines.

I have also heard rumors from this site that Gates is making a biodiesel compatible fuel hose, Product ID# is 4219-BD, a 2ply black CPE compound (Chlorinated Polyethylene). Sales contact Mr. Bob Baier 303 744-5147

Here is an excellent link to Biodiesel resources!

SoDak has now been running for about 3,000 miles on B100 (100% biodiesel) with no issues. For the winter, it will use B50.

Friday, August 26, 2005

Glow Plug Wiring Diagram

How to Set Your Pump Timing


Checking the injection timing is a breeze. Adjusting the ignition timing is a huge pain-if you don't know what you are doing. Here are some tips.

Remove the vacuum pump first. It's only 2 nuts and will make checking/adjusting the timing MUCH easier.There are 2 hex nuts and 1 allen bolt holding the injection pump. The allen is a 6mm and is on the top, towards the passenger side. The 2 hexes are easy to get at. The allen is easy if you remove the vacuum pump as I mentioned earlier. You will need a LONG 3/8" extension an an allen socket. Make sure you hammer on the end of the extension to make sure the allen socket is properly seated in the bolt so you don't strip out the bolt. If you strip the allen you are SOL.

The copper washer in the injection pump timing port can be hard to remove. Use a pick. To resuse the washer, just heat it with a propane torch!

Sunday, August 21, 2005

Volvo '89 740 Gas Wiring Diagram Scan

Thank the russians for this very nice wiring diagram scan.

Werick's Volvo Parts Vendors

I get all my parts from FCPGroton, Autohaus Arizona or Volvo Parts Direct

They all have great prices. If dealing with FCPGroton you have to request a price from Nick. They don't list Volvo Diesels but they can get the Parts.

You're gonna need to buy lost of parts for the money pit if your car looks anything like mine... ;)

Saturday, August 20, 2005

Help! I lost my Key!

Ha! Lucky for you, you just need to give your local independent Volvo repair shop your VIN#. They call up Volvo and you can have a new key in an hour or two. PLUS, you get a REAL key, not one copied from another, that was copied from another, that was copied from another. It doesn't stop there! You also get the rubber around the key just like the factory ones!

Cooling System Diagram for Veggievolvo


The hose that goes over the head is the return line from the oil cooler. You might want this diagram if you're doing a WVO conversion.

Tuesday, August 16, 2005

Oil Filters


You have several options for oil filters on the D24T.

One is the Fram 977A, which is readily available.

Another, the WIX 51333, also readily available

Another is the Mann W 950/4, which you will have to order. Other part numbers for the Mann are 1328162 or 074 115 561
The Mann is also used for the Eurovan '92-'96

The NAPA part number is 1773 for the FRAM equivalent

Plan ahead and use the Mann

D24T Family Tree

Here is a link to an SAE document about the development of VW diesel engines that I found interesting
SAE Document #820441

D24T Ramblings from Badge988

The first non-turbo motors had wall wear problems like no ones business. This was because first they had no real oil cooling and second not enough oil reached the walls due to the tight clearances of the rod and main bearings. Little throw off means little oil and lots of wear. The turbo motors had piston cooling jets located on the left side of the engine that went directly to the oil gallery and they had a sandwich type oil/water cooler that knocked temps down by 40 degrees C.

The second issue was the fact the non turbo motor burned dirty meaning lots of smoke per given mile, this loaded the heck out of the rings and made them stick and the hard carbon was a good abrasive to the walls so it was like running a 1200 grit paper lightly over the walls at all times. No piston cooling to speak of in a diesel makes pistons expand tighter at high temps and this put more pressure against the walls.

The other issue was with the casting itself. The non turbo motors were made of a low nickel iron that was hard and brittle, easily machined but was a poor running surface, the turbo blocks were a high nickel iron that wore better, was harder to machine and heavier by almost 25 pounds. Thread retention was better with the turbo blocks but with the machining issues the threads were thinner and more prone to breaking. A give and take with this but I have only seen 2 issues with this so far.

The other issues were with timing belts and heads themselves. The lower crank pulley is held with a very stout 15MM fine thread bolt that is torqued to a real value of 425 ft/lbs and this is all that holds the lower timing gear to the crank. The key is only to locate the timing sprocket and provides no driving force through the assembly. Timing belts need to be changed at the proper intervals at the very least, 50k miles is a better calender to follow with these. Many times people will take the car for a timing belt and the mechanic will not tighten the lower bolt to the 425 pounds because they dont have the torque wrench available or are just to damn lazy and use a breaker bar until it feels good. Either way you will end up with a slipped timing lower gear with a broken off key and a mashed valve or busted camshaft. I have seen both and Im holding onto a trashed block that has a good crank, this one lost the lower key to a slip and it busted the cam up through the top cover.

Heads... Early models used a 10MM head bolt that was a non torque to yield or TTY bolt, later blocks and all turbo used 11MM TTY bolts that needed to be retorqued in order to maintain good gasket compression for the head. The bolt was torqued to the yield point but retained enough "spring" to follow the head during expansion and would follow it down when cooling to maintain pressure on the gasket to avert surface shear. The heads themselves had no real issues other than surface cracking between valve seat inserts and warping due to mis-torqued bolts. Many an engine has been sent to the grave because some nit-wit mechanic said "your head has all these cracks and its bad. A new one is xxx thousands of dollars" and the owner would say no and junk it. The crack is superficial and extends to a maximum of 0.5 to 1MM deep and has almost 6 more millimeters to go before it hits water. I have yet to see one hit the water table and normally I dress the cracks to a 45 degree rounded radius and blend it down to the level of the valve seats.

Valve adjustments


You should adjust your valves every 15,000 miles. To do the adjustment you neet Hazet tool 2574. Be careful as there are several variations on this tool. The one you want is pictured. Some variations are too small to fit the camshaft and are meant for gas VW motors while others are not as ergonomic.

You will also need a supply of VW diesel valve shims. It is also helpful to have a micrometer to verify shim thickness if the numbers have worn off.

To remove the shims use either the VW tool or a shot of compressed air in the notch on the valve depressor.

Do yourself a favor and draw a diagram before you start showing the 12 valves and which are exhaust and which are intake valves.

Your valve clearances will most likely be SMALLER than spec so you will have to put in thinner shims.

Glow Plug Fuses


Extra fuses are always good to have on hand. You will not find the glow plug fuse in any local auto parts store so all the more reason. The glow plug fuse on the D24T is basically a flat strip of metal. It is rated for 80 Amps and available only through Volvo for a cost of less than $3. To replace the fuse you need a 10mm socket to remove two nuts that hold the glow plug relay (located on top of the driver's wheel well) and a phillips screwdriver to replace the fuse. It is good practice to clean all electrical contacts that you disassemble with contact cleaner.

Monday, August 15, 2005

Grease and Oil and Contact Cleaner, Oh My!


From perusing the brickboard, many people recommend using synthetic oil in your D24T, but when you consider the D24T needs 7 quarts of oil you have a hard choice to make. 7qts. X $6.50 gives you $45.50 just for the oil! Ouch! Do your engine right and go synthetic, especially if you live in a colder climate. Personally, I use Castrol Syntec 5W-50

For grease, I ALWAYS use Sil-glyde, part part # 765-1351 from NAPA. It is a silicon grease that is wonderful for just about everything. It can be used on electrical connections, distributors, brake systems, etc. NAPA makes another silicon grease, but it is more watery and, in my opinion, not as good.

To clean electrical contacts I use an oxidation solvent like Wurth Contact OL. There are many brands out there. This stuff works wonders. Just spray it on the contacts of a connector and forget about it.

Changing Your Fuel Filter


When changing your fuel filter it is a necessary to first fill the new filter with diesel fuel. Most of us don't keep a can of diesel lying around. Would you like to get a free injector cleaning along with your new fuel filter?

Fill the new filter with ATF, screw it on, open the bleeder port on top of the fuel fiter housing and apply a vacuum, i.e. find a clear piece of tubing of the right size from an aquarium store, stick it in the bleeder hole and suck. Use clear tubing so you don't swallow any ATF. It doesn't taste very good. Trust me.

Your diesel will start and run on ATF. ATF contains a high concentration of detergents which will clean your injectors of deposits. A pint of ATF in a tank of diesel every once in a while is a great idea as well.

FYI, you may have to crank your engine quite a few times to get your motor started after chnaging your fuel filter.

Sunday, August 14, 2005

Glow Plugs


Contrary to popular belief, it IS possible to replace all 6 glow plugs without removing the fuel pump. You need to purchase a SHORT combination wrench to fit the glow plugs, remove the rear timing belt cover and go in through the rear timing belt to get glow plug #6. The hardest part about this job was reattaching the glow plug wire for #6. I needed a deep offset wrench like the ones at right. Craftsman makes them, but I used a Hazet.

Please clean off the electrical contacts while you are doing this job. I use Wurth Contact OL

Replace any missing insulation on the copper strip with heat shrink tubing.

Changing the Front Timing Belt

It is absolutely essential that you change the timing belt at least every 60,000 miles. If the belt breaks, the valves will collide with the pistons and then you can say good-bye to your engine. The procedure can be found in AllData. I will just give you a few pointers from when I did the job.

If the water pump has not been done in a while now is a great time to do it. If the pump is recent, you might want to buy a new water pump o-ring to ensure a good seal.


You must remove the crank pulley to do this job. This is a huge pain. The crank pulley bolt should have been installed with Loc-Tite and torqued to >250 ft./lbs. It was necessary for me to use a chain wrench with a 3' handle and a 3' breaker bar to remove this bolt. YIKES! The other option is to remove the radiator etc. and get in there with an impact.

The crank pulley is keyed, but the key is only there for alignment purposes. It has little structural strength, hence the outlandish torque. I torqued mine to 250ft./lbs. and then tightened it some more using the aforementioned 3' breaker bar.

It is of the utmost importance that the crankshaft is spot on TDC. Buy yourself a small mechanic's mirror and use it to site the TDC mark as if the engine were out of the car and you were looking straight down at it.

The manual does not show you how to install the tool 
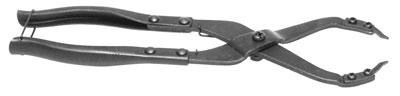
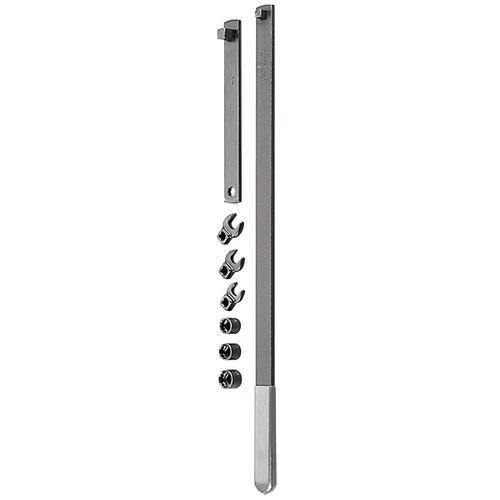
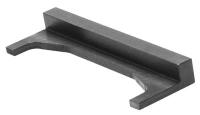
. You need to remove the rear camshaft sprocket(make sure to lock the injection pump at TDC with the pin) and I found it necessary to remove the last two valve cover studs. There is a slot in the back of the cam that the tool fits into.

Belt tension: I installed mine too tight and it "howled". I kept on loosening it bit by bit until it didn't howl any more. The VW tensioning tool is over $100. Ouch. I can push/deflect mine 45 degrees with one finger-not trying that hard.

While doing the belt, it would be prudent to change the tensioner as well.

I found it easiest to remove the power steering pump when doing this job. It's only a few easily accessible bolts.

Volvo Diesel Manuals and AllData

Personally, I have been unable to locate the green factory manual for the diesel Volvos until some kind soul pointed me to a sounce for mauals, Volvo TechInfo. I had resorted to using a Volkswagen Rabbit Diesel manual and a Volvo 760 manual that just has specifications for the D24T and very little diesel repair info.

If you don't have a manual, use AllData. Many of you are unaware that the same database professional mechanics use is available free of cost to you. Many libraries subscribe to the AllData database. Call your local librarian to find out. AllData is basically a database of all factory repair manuals for all automobiles. This is where I got the information on how to set the cam timing, injection timing, etc. It has the complete procedure as well as relevant pictures. It does not have everything, however. Regardless, it is a wonderful resource. Support your local library! (my sister is a librarian)

Saturday, August 13, 2005

Cold Start Device


Now that the cam timing and injection pump timing are spot on, it was time to figure out why the car started so horribly cold(lots of white/blue smoke).

One obvious issue was that the coolant-regulated cold start device was non-functional. It is designed to advance the injection pump timing for cold starts. I called up Bosch and they put me in touch with a dealer that could order the part for me. From the swedishbricks.net FAQ, 1-467-202-302 is the correct part number. It cost me about $50.

To replace the innards of the cold start device you will need a vise, small needle-nose vise-grip, 4mm allen, a hammer and a punch. When you disassemble the device you will quickly notice that it is unde a LOT of spring pressure.

The punch is used to get the wax thermostat out of its housing. Here is a picture of my old one cut in half(above). It has a rubber boot that goes around a sliding rod. I have no idea how this thing works, but I like to take things apart.

When you get the thermostat in the front housing(the one with the coolant ports), take the rear housing with all its springs, cable, etc. and compress it in a vise. The cable should come out the back exposing the stainless steel shaft that the cable is crimped into. Put the needle-nose vise-grips on the shaft so that whe you release the vise, the springs stay compressed. Install with the two 5mm allen bolts and then remove the vise-grips.

I recommend soldering the cable end. It will keep the cable from fraying, which mine is doing.

Cam timing and compression

The out-of-sync cam timing in my previous post also caused me to get low compression readings as you will read below. Compression testing this motor is quite an ordeal. Before you compression test, adjust your valve clearances. First, you need to remove the injector lines with a 17mm line wrench, carefully labeling which goes where. Second, you need a deep-well 27mm socket with thin walls. I also found it necessary to use a serpentine belt tool(picture at left) to remove injector #5. The extremely low profile of the 1/2" drive part of the tool(at upper left in the picture) allowed me to squeeze between the injector and the injection pump. I recommend the Craftsman as it was the least expensive tool I found. Be sure to blow out all of the sand/dirt/etc. from around the injectors as you remove them. Once I had the injectors out, I removed the heat shields with a large screw. I threaded the screw into the hole in the heat shield and used a slide hammer to pull out the shield.

I found it very difficult to find a diesel compression gauge (onethat reads up to 500 psi) at local auto parts stores. You also need the adapter for injector hole (see pic at right) This adaptor is the same as the VW one.

I bought my compression tester off Ebay from http://www.tooldesk.com/ It came with the adapter. The brand is ATD. This gauge is garbage. Mine didn't work right out of the bag. Wouldn't hold pressure. Good old "Made in the USA" Quality :/ Do yourself a favor and buy a good quality gauge.

My compression readings (with bad cam timing) were 400 psi for cylinders 1-4 and 360 psi for cylinders 5 and 6. This is fitting with the general consensus that cylinders 5 and 6 can become starved of oil under certain conditions.

Background

I purchased "Sodak" in the summer of 2005 off of Ebay. In doing so I broke the cardinal rule of used car shopping; Never buy a car without having it checked out by a mechanic (me). As a result, I paid too much for a car that was not as described. Fortunately, I have decent mechanical skills and a very good friend, Stew, who is a professional mechanic who owns an import repair shop.

My wonderful wife Armaiti and I drove Sodak home to St. Paul, MN from Sioux Falls, South Dakota. On the way home she (the car, not my wife) blew an oil cooler hose. Luckily we made it home OK without overheating.

The first order of business was replacing the hose. My friend Stew graciously allows me to order parts through his shop at a slight discount. The hose was available only through Volvo at a cost of $33. Upon inspection of the other hoses, I thought it would be prudent to replace other hoses as well. Fortunately, the upper and lower radiator hoses are available aftermarket for a cost of $15 and $33 respectively. Note: there are two versions of the upper and lower radiator hoses. One has flared ends and the other does not. The hose pictures is the lower hose WITHOUT the flared ends. Many of the other smaller hoses are available only through Volvo and are around $45 each so I decided to worry about them later. I had bigger issues to deal with.

Upon acceleration, the 740 emitted so much black smoke you could hardly see the vehicle behind you. I know diesels smoke under hard acceleration, but this was ridiculous! I proceeded to do a quick check of the injection timing. It was WAY off. This meant that the crankshaft and camshaft were possibly out of sync and this and the incorrect ignition timing would explain all of the black smoke. Evidently the swedish Volvo mechanic that did the front belt last did not do such a good job...

Introduction


I'm creating this blog because there seems to be very little information out in cyberspace about the Volvo 740 Turbo Diesel. The information I did find was horribly disorganized. The aim of this blog is to relate my experiences resurrecting a 1985 Volvo 740 Turbo Diesel so that others may benefit from the knowledge I have gained in the resurrection process.